Configure Real-Time Event Counters
You must:
- Create an event counter
- Assign the counter to an action cell or to an exit point link in your script.
-
Expand the Counters panel by clicking its
 button.

-
In the panel, name the counter and set the type and value.
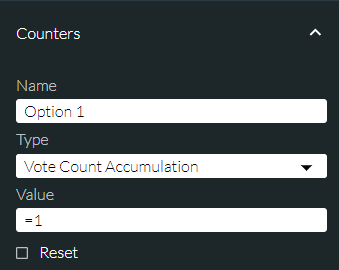
If the Reset check box is shown, select it if you want to force the counter to reset to zero at a particular time every day.
-
Click the
 button to save the counter. The new counter is listed in the Events section below:
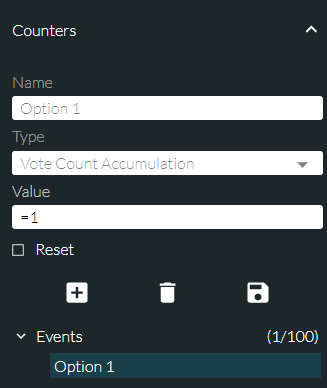
- To add another counter, click the
 button and repeat the steps above. By default, you can add up to five counters. (If your organisation wishes to increase this default value, contact your local support representative).
Note: to delete a counter, select it and then click the  button. You cannot do this once the counter has been assigned (see below).
Assigning the Counter to an Exit Route or an Action Cell
Counters can be assigned to an instance of the Publish Live Event action cell or to any exit route. Assigning a counter to a Publish Live Event action cell is the same as assigning any property to an action cell (see Configuring action cell properties). The following steps describe how to assign a counter to an exit route.
-
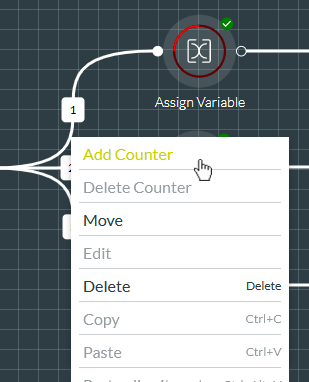
Right-click the exit route and then select Add Counter from the context menu:
-
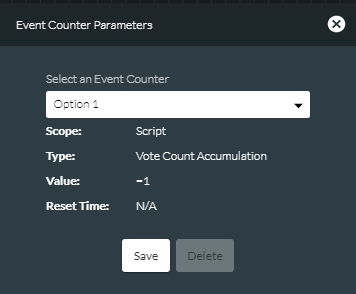
Select the desired event counter.
-
Click Save.
The exit route link changes colour.
Note: you can unassign an event counter by right-clicking the link and selecting Delete Counter.